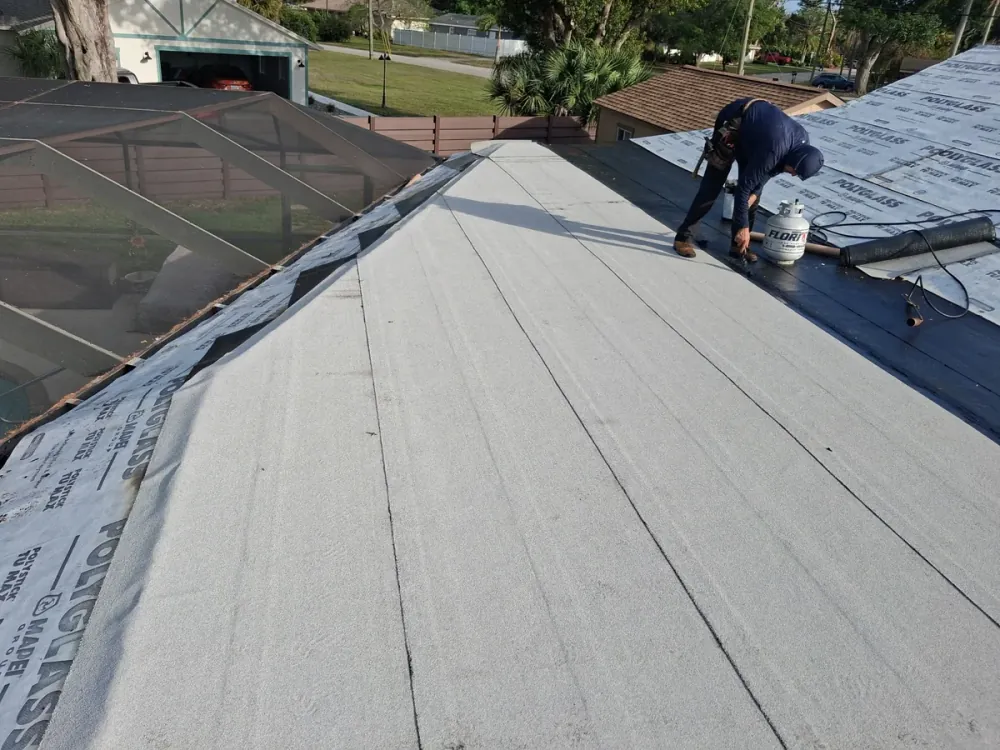
When you search for roof fixers near me, you're usually in crisis mode: a leak has appeared, the insurance adjuster is on the calendar, or a storm left visible damage. But before the crew rolls up, there's a critical window to act. The homeowners who document damage thoroughly, clear their property, and communicate clearly with their contractor don't just move faster—they also protect themselves legally and often reduce their repair costs. This guide walks you through the exact steps to take before roof fixers arrive in Sarasota and Manatee County, so your repair is efficient, compliant, and fully documented.
Critical Questions This Guide Answers
- What physical preparations minimize delays and protect my home during roof repair?
- How do I document roof damage in a way that supports an insurance claim in Florida?
- What role do local HOA rules and permits play in roof repair in Sarasota and Manatee County?
Key Findings
- Document all roof damage with dated photos and videos—wide shots and close-ups—before the crew arrives; this is your proof for insurance claims and typically required by Florida adjusters.
- Clear a 15-foot perimeter around your house of vehicles, furniture, grills, and decorations to give roofers safe, unobstructed access and prevent property damage.
- Confirm arrival time, material drop-off location, dumpster placement, and your on-site point of contact at least 24 hours before the crew arrives to avoid miscommunication and delays.
- In HOA communities, provide your contractor with approved materials and color specs from your Architectural Review Committee to prevent compliance violations and costly do-overs.
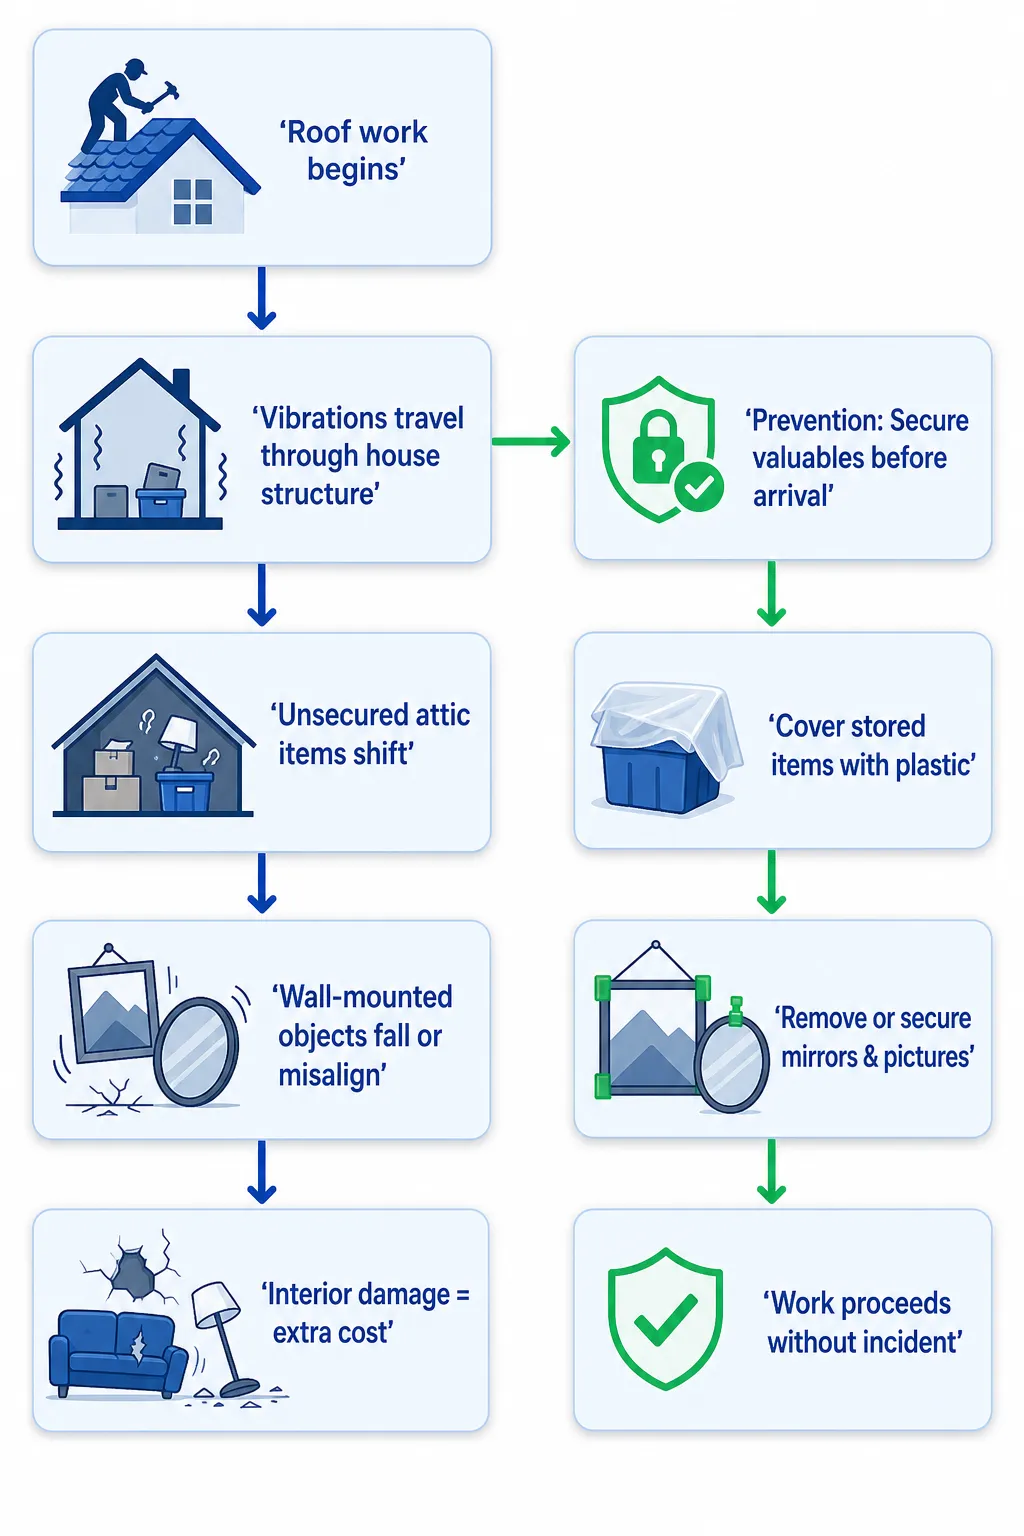
- Protect your attic and interior from vibration damage by securing or removing wall-mounted valuables and covering stored items with plastic sheeting.
Methodology
This guide draws on Florida property law (specifically the one-year claim window under state statute), current roof repair cost benchmarks for the Sarasota and Manatee County region, and best practices from licensed roofers and insurance adjusters in Southwest Florida. The checklist reflects real-world workflows used by contractors and damage assessors to streamline repairs and minimize interior exposure. All recommendations comply with local HOA rules and Sarasota and Manatee County permit requirements.
1. How Roof Fixers Near Me Assess Damage: Why Your Documentation Matters Before They Arrive
Every insurance adjuster in Florida wants the same thing when they show up: proof that the damage existed before repair work started, and proof that it happened on or near the date you're claiming. That proof comes from you, the homeowner, and it needs to be captured before the crew touches a single shingle. Adjusters are trained to be skeptical of undated, unverified claims—dated photos and videos taken from your own phone close that gap immediately.
So what should you actually photograph? Start wide, then go tight. Capture the entire roof plane where the damage occurred, then move in for close-ups of the specific tear, missing shingle, or cracked flashing. Don't stop at the roofline—head inside and photograph any water stains on ceilings, walls, or attic insulation. These interior shots are often what convinces an adjuster the leak is active and ongoing, not a pre-existing condition.
Timestamps matter more than most homeowners realize. Your phone's built-in camera app already stamps the date and time on the file metadata, but it's smart to also verbally state the date while filming a walkthrough video—this ties your voice to the timestamp and adds a layer of credibility that's hard to dispute. Once you've captured everything, upload it to cloud storage immediately. A cracked phone screen or a dead battery shouldn't be the reason your claim falls apart.
There's a real difference between casual documentation and adjuster-ready documentation. A single blurry photo from across the yard won't cut it; a series of wide-angle and close-up shots, paired with interior evidence and a narrated video, will. This same documentation also helps your contractor scope the job accurately before they even step on the roof, which means fewer surprises—and fewer change orders—once work begins. If you're unsure what a thorough assessment actually looks like, what a roof inspection actually covers is a useful companion read before your contractor arrives.
- Use your phone to capture video walkthroughs of damage; narrate what you see so the timestamp is tied to your voice and credible.
- Take photos of the roof from ground level (showing the problem area) and, if safe, from a ladder or upper-story window—insurance adjusters want multiple angles.
- Photograph interior damage too: water stains on ceilings, walls, and attic insulation, as these prove the leak's path and severity.
- Save all photos and videos to cloud storage (Google Photos, OneDrive, iCloud) immediately—local phone storage can be lost if the device fails.
2. Prepare Your Property: The 15-Foot Perimeter Rule and Vehicle Placement
Roof crews don't just need access to your roof—they need room to work around your entire house. Ladders have to lean somewhere, materials get staged on the ground before they're hoisted up, and debris has to fall into a controlled zone rather than onto your car or your kids' bikes. A clear 15-foot radius around your home's perimeter gives the crew the room they need to work safely and efficiently.
Start with vehicles. If your driveway is where the ladder needs to go up, move your car to the street or a neighbor's spot for the day. If you've got two vehicles and one driveway, sort out parking the night before—don't make the crew wait while you shuffle cars around at 7 a.m. Outdoor furniture, grills, potted plants, and any yard decorations should move at least 15 feet away or into the garage. A cluttered work zone doesn't just slow things down; it puts your belongings at risk from falling debris.
If you've got young trees, garden beds, or anything delicate in the landscaping near the work zone, flag or tape it off so the crew knows to route around it. Most roofers will respect marked areas without being asked twice—it's a small gesture that signals you've thought this through, and it often gets you a little extra care in return. Don't forget outdoor equipment either: A/C units and heat pumps sitting near the work zone should be covered or gated off to avoid debris damage.
- Roofers need space to move ladders, carry materials, and position trucks safely; a cluttered yard adds 1–2 hours to every job.
- If your driveway is narrow, ask the contractor in advance where they'd prefer to park and stage materials.
- Delicate plants and garden beds can be damaged by foot traffic or falling debris; marking them in advance shows the crew you value care.
- If you have outdoor pets, make arrangements to keep them indoors or in a secure, separate area during the repair.

3. Protect Your Home's Interior: Attic and Wall Prep to Minimize Vibration Damage
Nail guns, foot traffic, and material handling on the roof deck all send vibration through the entire structure of your house—more than most homeowners expect. That vibration travels down through the rafters, into the attic, and eventually into your walls. If you've got boxes stacked loosely in the attic or picture frames hanging without secure anchors, this is the moment they shift, tip, or fall.
Start in the attic. Cover stored boxes, exposed insulation, electrical wiring, and any HVAC ductwork with plastic sheeting to contain dust and debris that inevitably shakes loose during roof work. It's a five-minute task that saves hours of cleanup later. Then move through your interior rooms, especially those directly beneath the work zone: take down or secure wall-mounted mirrors, shelves, and light fixtures that could shift or fall during the repair.
If you have tall furniture in adjoining rooms, secure it to wall studs if it isn't already anchored. Closing interior doors between the work zone and the rest of the house is one of the simplest, most effective dust-control measures available to you—it costs nothing and takes seconds. Don't overlook your HVAC system either: cover ceiling and wall return-air vents so roofing dust doesn't get pulled into your air circulation and distributed throughout the house.
Ask your contractor directly whether they provide dust containment as part of their standard process. Many professional roofing repair contractors bring drop cloths and plastic barriers as a matter of course—but it never hurts to confirm before the crew arrives rather than discovering the gap mid-job.
- Plastic sheeting is cheap (under $20 for a roll) and prevents hours of cleanup and potential damage to stored items.
- If you have valuable artwork or collectibles in your home, move them to a safe room or a neighbor's house for the repair day.
- Closing interior doors between the work zone and the rest of your home is one of the simplest dust-control measures.
- Ask your contractor if they will provide dust containment; many professional roofers bring drop cloths and plastic barriers as standard practice.
4. Roof Leak Repair Costs in Florida: Minor vs. Major Repairs and Why Timing Matters
Here's the uncomfortable truth about roof leak repair: the same problem costs wildly different amounts depending on how long you wait. A localized issue—a few damaged shingles, a resealed flashing joint—typically runs between $350 and $1,500. Leave that same issue unaddressed for a few weeks, and water works its way into insulation, drywall, and framing. That's how a $500 fix turns into a $5,000 project.
Major repairs, running $2,500 to $7,000 or more, usually stem from storm damage, multiple concurrent leaks, or rotted decking that's gone unnoticed for months. The pattern is almost always the same: what started as a minor, cheap fix got delayed, and delay is what allowed the damage to compound. Florida's heat and humidity accelerate this process—moisture trapped in a roof assembly here does more damage per week than it would in a drier climate.
This is also where Florida's one-year claim window becomes urgent rather than abstract. You have 12 months from the date of loss to file, but waiting anywhere near that deadline weakens your position substantially. Insurers scrutinize gaps between discovery and reporting—the longer you wait, the more room there is for a dispute over whether the damage was storm-related or simply neglected maintenance.
Most Florida homeowner policies carry deductibles between $500 and $1,500. If your repair falls into the minor category, your out-of-pocket cost may be limited to that deductible alone, with insurance covering the rest. Getting a roof leak repaired within 48 hours of discovery often means the difference between full coverage and a drawn-out dispute over what caused the water intrusion. Keep every quote and invoice you receive—insurers frequently want multiple bids to verify that repair costs are reasonable for the region.
| repair_type | cost_range | urgency |
|---|---|---|
| Minor (localized shingles, flashing) | $350–$1,500 | High prep value |
| Major (structural damage, extensive water intrusion) | $2,500–$7,000+ | Critical documentation needed |
- Contact your insurance company and schedule an adjuster visit within 24 hours of discovering damage—delays weaken your claim.
- A minor repair now beats a major repair later; water damage compounds rapidly in Florida's heat and humidity.
- Keep all repair quotes and invoices; your insurance may require multiple bids to verify the cost reasonableness.
- If the repair cost exceeds your deductible, your insurer typically pays the difference directly to the contractor or to you.
5. Communicate With Your Contractor: The 24-Hour Pre-Arrival Checklist
Even the best roofing repair contractors juggle multiple jobs on any given day. A quick confirmation call or text 24 hours before your scheduled repair ensures the crew has the right address, the right day, and the right scope in mind—and it gives you a chance to catch any miscommunication before it costs you a wasted morning.
Ask where the crew wants materials staged. Some contractors prefer the driveway; others want a side yard or garage clear for supply drop-off. Confirm dumpster or debris placement too—will the contractor bring their own bin, or do you need to arrange one? Either way, make sure the placement doesn't block a neighbor's driveway or sit on top of a utility line, which can trigger its own set of headaches.
Decide who your on-site point of contact will be. If you're not planning to be home during the repair, designate a neighbor or family member who can let the crew in, answer basic questions, and handle anything unexpected. Leave detailed instructions—gate codes, driveway gate keys, anything the crew might need—with that person in advance rather than scrambling on repair day.
If you live in an HOA community, this is also the moment to hand your contractor your Architectural Review Committee approval, along with material specifications and color codes. Skipping this step is one of the most common—and most avoidable—causes of delay, because a contractor who shows up with the wrong shingle color has to stop and reorder before continuing.
- Text or email confirmation avoids phone tag and creates a record of agreed-upon times and locations.
- If you won't be home during the repair, leave detailed instructions (gate code, driveway gate key, etc.) with your on-site contact.
- Roofers appreciate clarity on parking and material placement; it speeds up their setup and reduces friction.
- If your roof is accessible from a neighbor's property, confirm access rights in advance so the contractor doesn't trespass.

6. HOA Compliance and Local Permits: Sarasota and Manatee County-Specific Rules
If you live in a community with an HOA, roof work almost never proceeds without written approval from an Architectural Review Committee—even for repairs that don't change the appearance of the roof. Committees typically want to verify color match, confirm material specifications, and sometimes review photos of the work area before a single shingle is ordered.
Separately, most roof repairs in Sarasota and Manatee County require a building permit. Your contractor typically handles this, but don't assume—confirm it explicitly and get it in writing as part of your quote. Standard permits are usually issued within 3–5 business days, but HOA approval can take considerably longer, especially if the review committee only meets on a weekly or biweekly schedule rather than reviewing requests continuously.
Skipping HOA approval isn't just a paperwork risk—it can trigger real fines, ranging from $50 to $500 or more, along with orders to halt work or remove non-compliant materials entirely. That's an expensive and frustrating outcome for something a phone call to your HOA management company could have prevented. Reach out to them as soon as you know repair or replacement work is coming, and ask for the current Architectural Review guidelines and approval form.
Most HOAs will want a material sample or color swatch alongside your application—ask your contractor for a cutting in advance so you're not waiting on that step separately. If the HOA denies your first material choice, work with your contractor to find an approved alternative rather than proceeding without sign-off; unapproved work rarely ends well for the homeowner.
| Scenario | HOA Approval Needed? | Permit Required? | Timeline Impact | Cost Impact |
|---|---|---|---|---|
| Minor repair (shingle or flashing fix) | Yes (check CC&Rs) | Usually no, if repair only | 1–2 days | No additional cost if pre-approved |
| Full roof replacement | Yes (Architectural Review) | Yes (Sarasota/Manatee requires permit) | 1–2 weeks for approval + permitting | Permit fee: ~$100–$300 |
| Cosmetic change (color or material type) | Yes (Architectural Review approval required) | Yes, if material differs from original | 2–4 weeks for full approval | Permit + potential material upsell |
| Best for efficiency | Always verify with HOA first | Always confirm with contractor | Budget 1 week before scheduling | Budget $200–$400 for permits |
- Contact your HOA management company immediately to obtain your Architectural Review guidelines and current approval form.
- Most HOAs require material samples and color codes; ask your contractor for a cutting or swatch before you submit approval.
- Permit delays are common but avoidable: confirm with your contractor that they pull permits and include the permit fee in their quote.
- If your HOA denies a material choice, work with your contractor to find an approved alternative rather than proceeding without approval.
If your damage turns out to be extensive enough to escalate from repair to full replacement, it's worth reviewing roof replacement costs and timelines in Sarasota so you understand the full scope before permits and HOA approval are even in the picture.
The Home-Staging Analogy
Preparing for roof fixers is a lot like prepping your home for an inspection before selling. Just as a real estate agent tells sellers to declutter and stage the property, a roofing contractor needs clear access, proper documentation, and compliance verification before they can do their best work. Skip that prep, and a job that should take one day stretches into three, with friction and frustration on both sides. The homeowners who treat this prep seriously don't just get faster service—they get a smoother, less stressful experience overall.
A Real-World Example: Five Days from Leak to Fix
Consider a Sarasota homeowner who discovers a roof leak on a Monday morning. Instead of immediately calling for a repair, she documents the damage with photos and videos, contacts her insurance company to file a claim, and reaches out to her HOA to confirm material approvals. She contacts three local contractors and schedules the one with the earliest availability. By Thursday, the adjuster has approved the claim, the contractor has pulled the permit, and the HOA has confirmed the approved shingle color. The repair happens Friday without delays or fines. Total time: 5 days. Total out-of-pocket cost: her insurance deductible only. Had she skipped documentation or HOA approval, she would have faced delays, possible fines, and the contractor might have had to stop midway to obtain approval.
What This Means for You
- For homeowners: Your 15-minute prep session today prevents a week of delays, potential claim denials, and HOA violations tomorrow. Documentation and communication are non-negotiable when roof damage happens.
- For property managers: A pre-repair checklist protects your managed properties and speeds up claims. Require all contractors to confirm arrival details and HOA compliance before scheduling.
- For HOA board members: Establish clear architectural review timelines and require proof of member compliance before repairs begin. This prevents unapproved work and protects the community's property values.
- For contractors: Homeowners who prepare their property in advance schedule jobs more efficiently and pay faster. Use this checklist as part of your pre-arrival communication to set clear expectations.
Frequently Asked Questions
How quickly should I search for roof fixers near me after discovering a leak?
Ideally within 24 hours. Florida water damage spreads quickly in our heat and humidity, and getting a repair scheduled fast often means the difference between a covered claim and a coverage dispute. Document the damage first, then start calling contractors.
Do I really need a permit for a minor roof leak repair?
Not always—minor repairs like a shingle or flashing fix usually don't require a permit in Sarasota or Manatee County if no structural work is involved. Full replacements and any change in material almost always do. Confirm with your contractor in writing so there's no confusion about who's responsible.
What happens if I skip HOA approval before urgent roof repairs?
You risk fines ranging from $50 to $500 or more, plus an order to halt work or remove non-compliant materials. Even in an emergency, it's worth a quick call to your HOA management company to confirm the process—most committees can move faster than expected once they understand the urgency.
Will my insurance cover the full cost of roof leak repair?
It depends on your policy and how quickly you act. Minor repairs are often fully covered after your deductible, especially when documented and reported within days of discovery. Major repairs depend more heavily on your specific policy terms and how the claim timeline unfolds.
Can I prep my property myself, or should I hire someone?
You can absolutely handle this yourself—it's mostly moving vehicles and furniture, covering attic items, and taking photos. None of it requires special skills, just about 15–30 minutes of focused effort before your contractor arrives.
Keep Learning
- Top Roofers Near Me in Sarasota & Manatee County: How to Vet Local Contractors — Once your property is prepped, learn how to evaluate and vet the contractors who respond to your repair request. This guide covers credentials, licensing, insurance, and red flags.
- Storm Damage Roof Repair Near Me: Sarasota & Manatee County Homeowner's Guide — If your roof damage is storm-related, this guide covers insurance claim specifics for hurricane and severe weather damage in our region.
- Roof Replacement Cost in Sarasota: A 2026 Price Guide — If your damage is extensive and repair escalates to replacement, understand the full cost breakdown and timeline for your area.
- What a Roof Inspection Actually Covers in Sarasota, FL | Complete Guide — Learn what a professional roof inspection reveals and why it's a valuable tool for documenting existing damage before repair.